If you're experiencing issues with our RGB Lighting (Light Bars, Strip Lighting, Rock Lights etc), follow this guide to identify and resolve common problems.
1. LED's Partially Lighting Up
Possible Cause: Incorrect parameters or LED damage.
✅ Solution:
- If the issue started after replacing a controller, the parameters may need adjusting. Follow our Parameter Adjustment Guide to correct this.
- Check for any damaged LEDs along the whip. If an LED has failed, this could prevent full illumination.
2. Colours do not correspond to what is selected in the app
Possible Cause: RGB Parameter Issue or Controller issue.
✅ Solution:
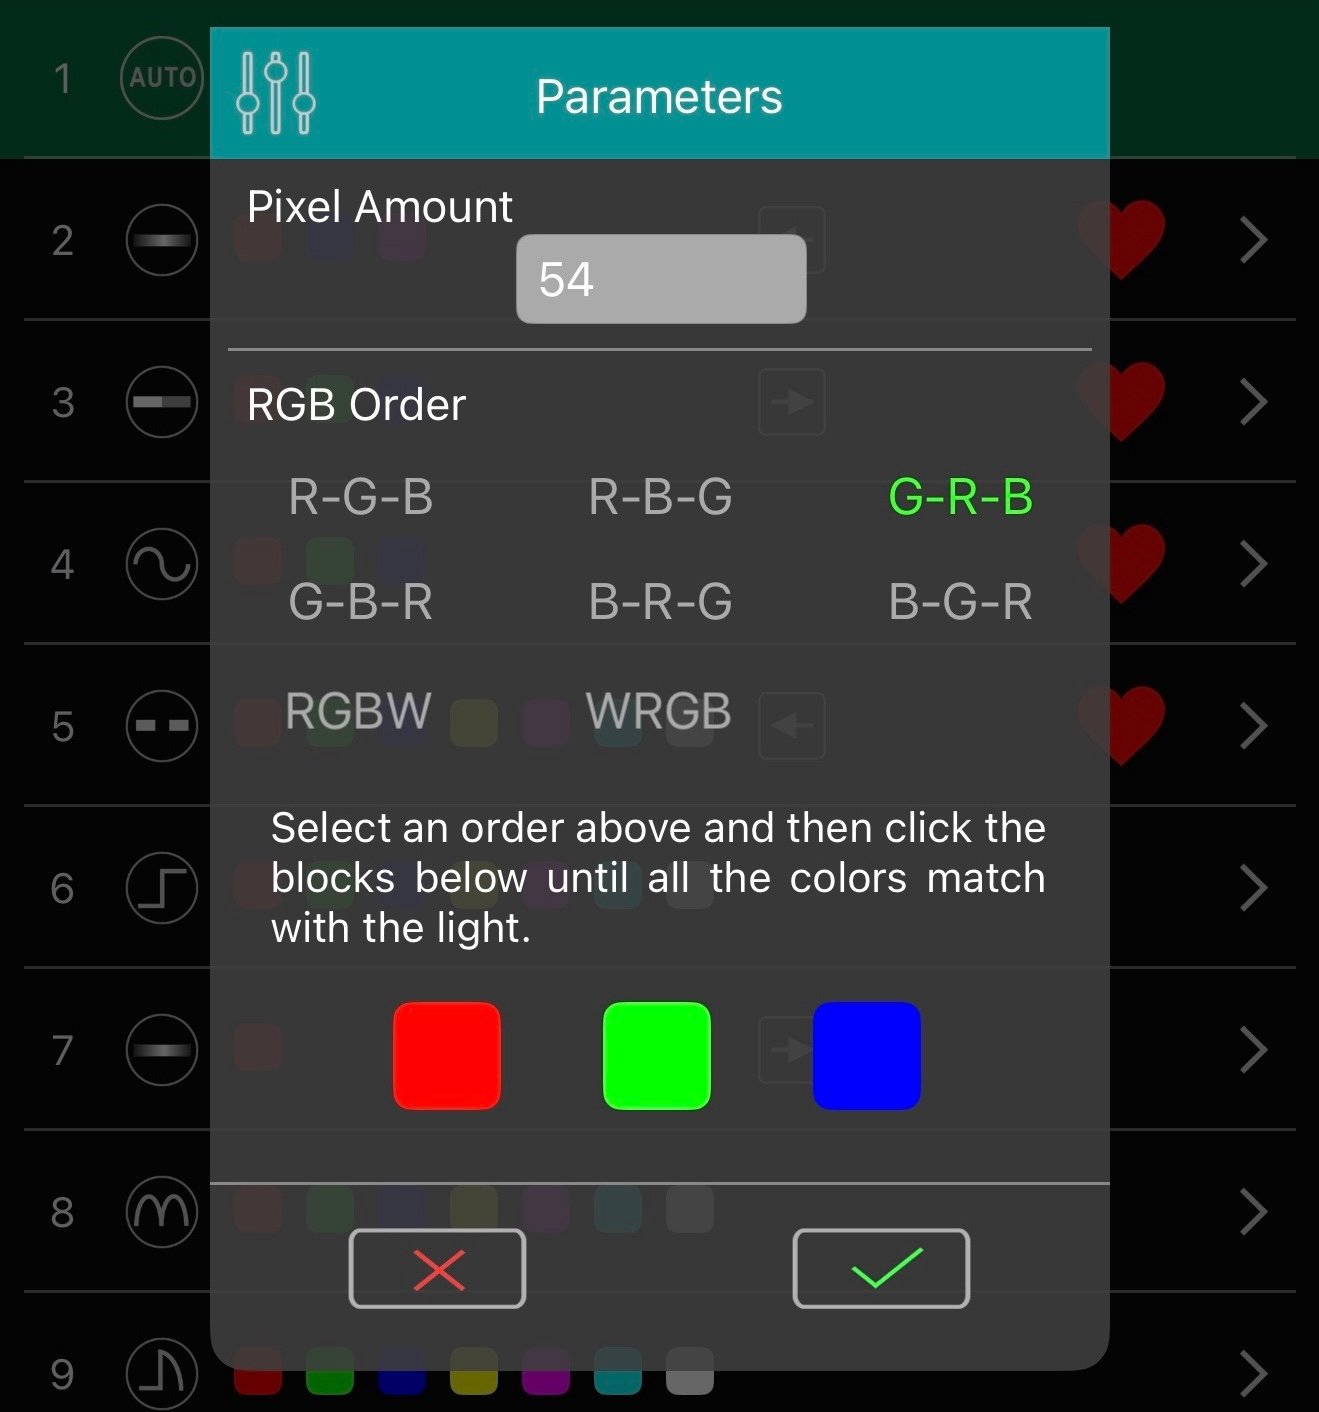 Open the app settings and check the RGB configuration. Adjust it accordingly.
- Find out more on our Parameter Adjustment Guide
3. Controller is not responding
If your controller is not responding, try these troubleshooting steps:
- Ensure Power Supply is Connected: Check that the controller is properly powered.
- Reconnect the Power Source: Disconnect power (pull out the fuse) for 30 seconds, then reconnect.
- Ensure Bluetooth Is Enabled: Make sure Bluetooth is turned on and Airplane Mode is OFF.
- Restart the App & Device: Close the app, restart your phone, and try again.
For additional help, visit our App Troubleshooting Guide.
4. LED's aren't syncing
Possible Cause: Connection or Controller Issue
✅ Solution:
- Check all wiring connections to ensure they are secure.
- Disconnect the controller from power and reconnect.
- Swap the lights around if possible:
- If the issue persists on the same light, the light itself may be faulty.
- If the issue moves to the other light, the controller may be faulty.
5. Moisture Ingress or Physical Damage
If you notice moisture inside the whip or physical damage, you have two options:
1. Warranty Claim – If you believe this is a manufacturing issue, send us photos for review.
2. Replacement Inquiry – If the damage is not covered under warranty, you can contact us to purchase a replacement.
If you've identified the faulty product, contact us via our Contact Us Page. Please provide:
- A photo of the issue
- Your order number
- Confirmation that you've completed this troubleshooting guide
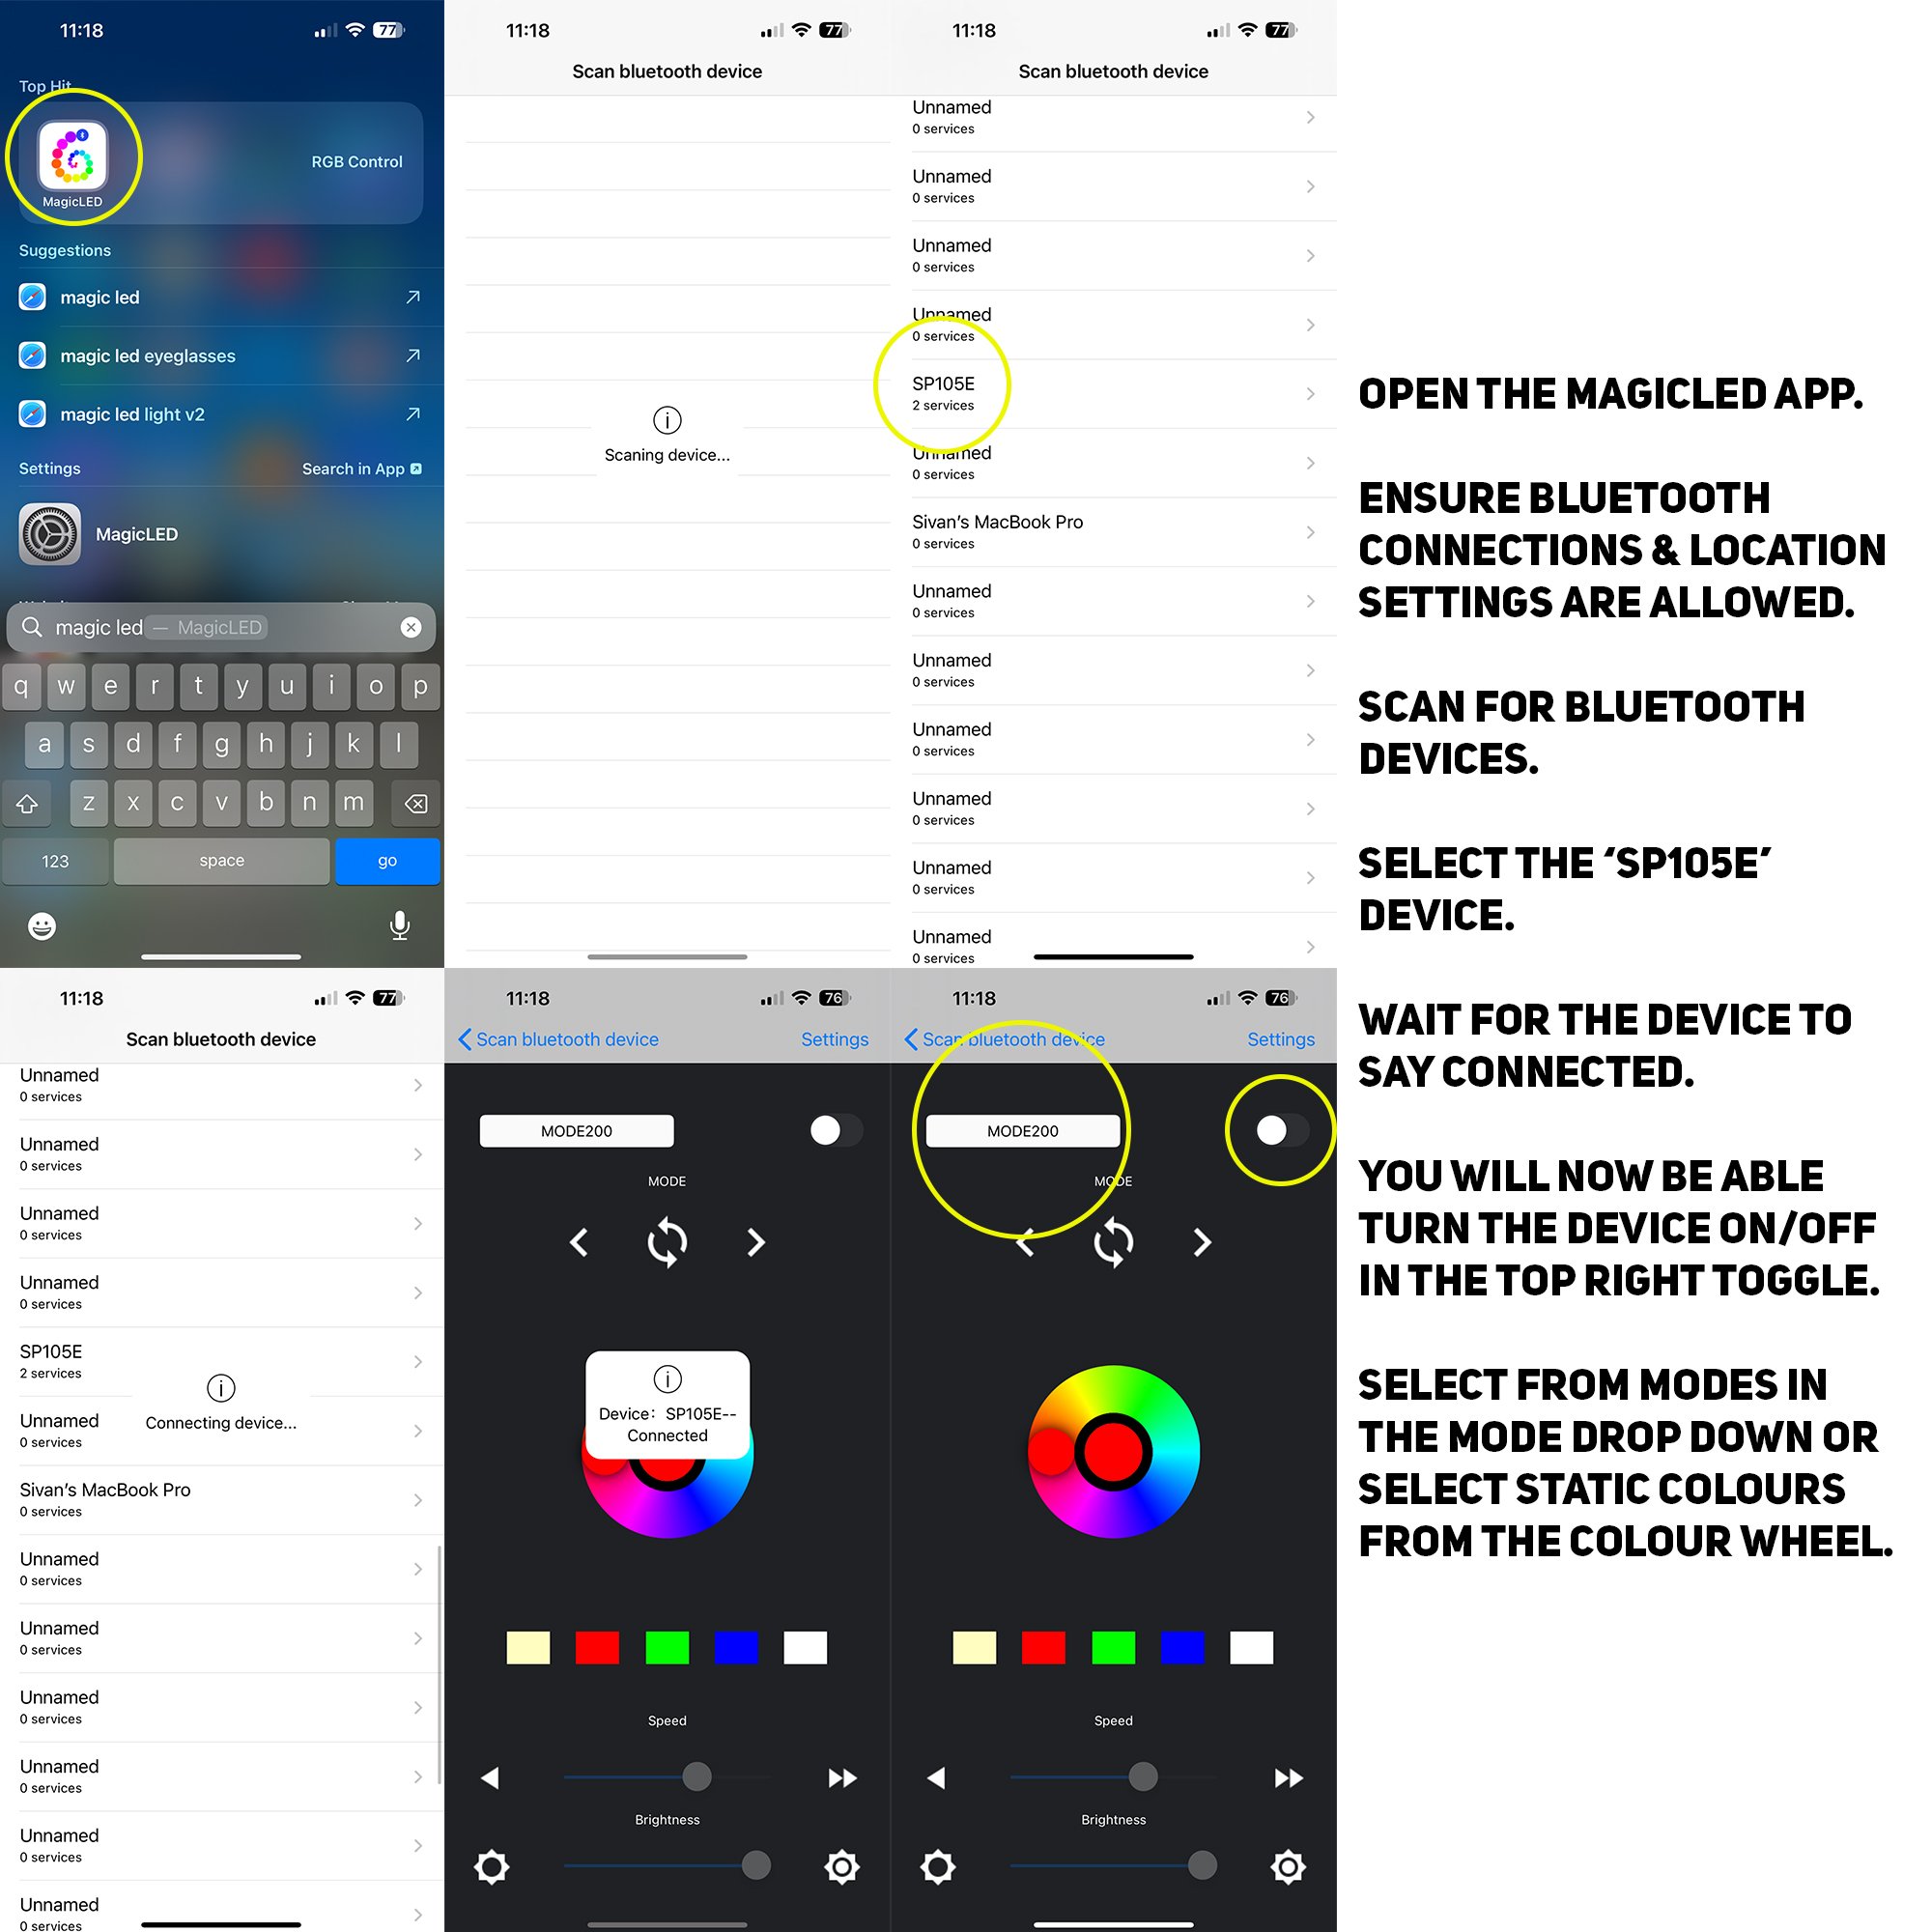
 corner of the app.